External Pseudonym
This page allows you to create or import pseudonyms that Karnak will use during de-identification. The de-identification process and how pseudonyms are used is detailed in the Pseudonym chapter.
De-identification is activated in the Destination configuration.
Info
Pseudonyms created or imported on this page are stored in a cache with a maximum lifetime of 7 days.
With the portable version of Karnak, the cache is persistent only the time the application is running. Restarting the application will clear the cache.
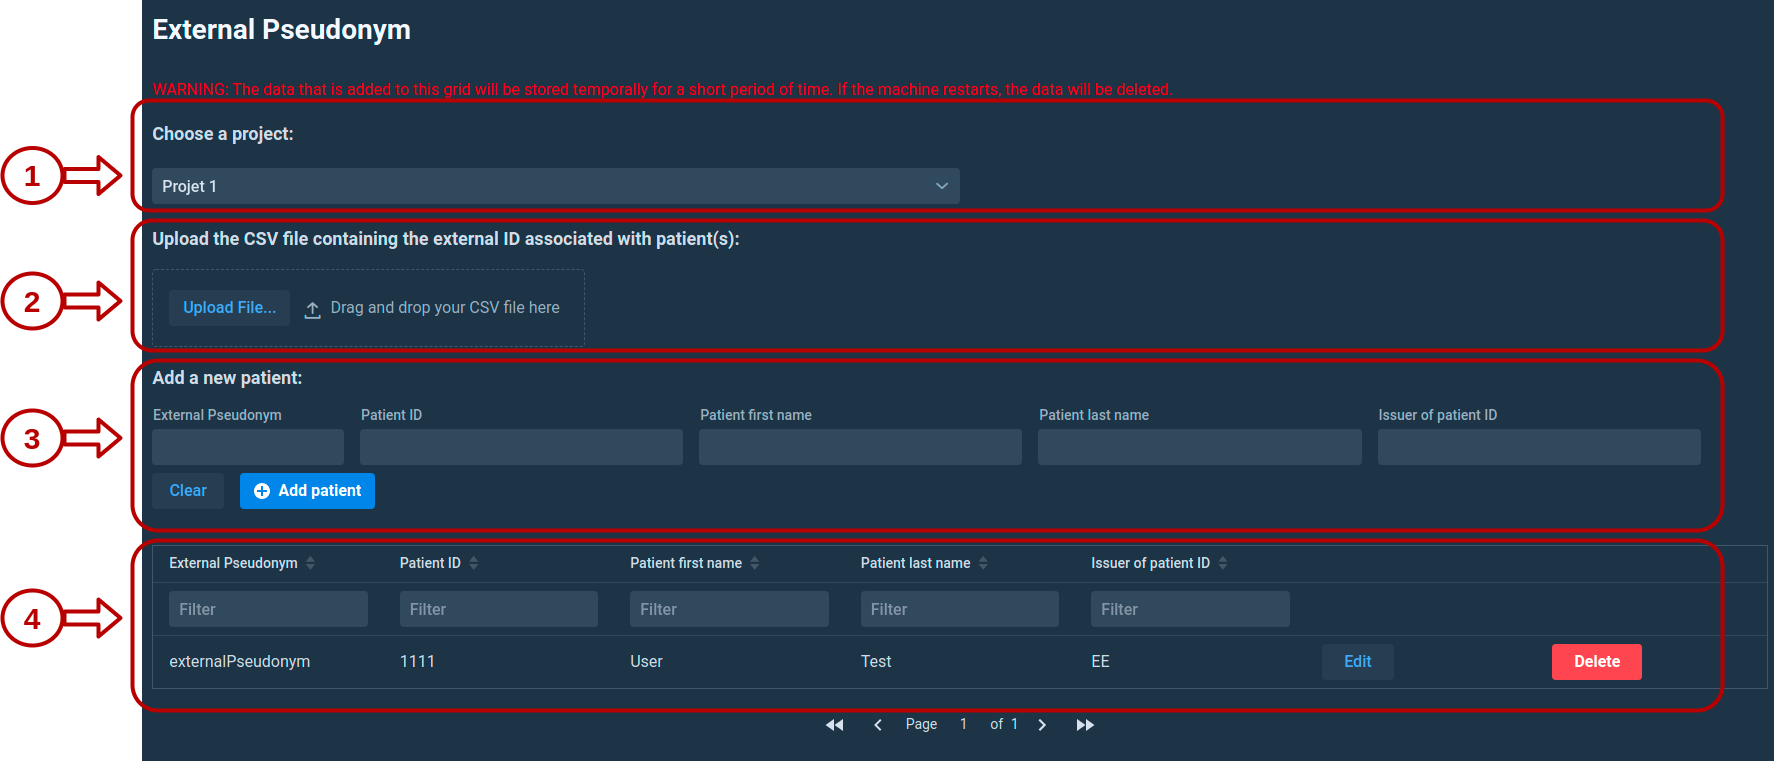
1. Choose a project
External pseudonyms are linked to a specific project. This allows Karnak to properly handle cases where:
- A patient participates in multiple clinical studies with different pseudonyms
- Potential pseudonym collisions occur between projects
2. Upload a CSV file
You can upload a CSV file containing external pseudonyms by:
- Clicking the Upload File button
- Dragging and dropping a file onto the upload area
2.1 CSV separator configuration
After selecting a file, a dialog appears asking for the CSV separator character. The default value is a comma (,).
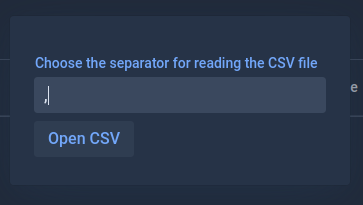
Click Open CSV to proceed to the import configuration.
2.2 Preview and configuration
The CSV data is displayed in a grid for review and configuration.
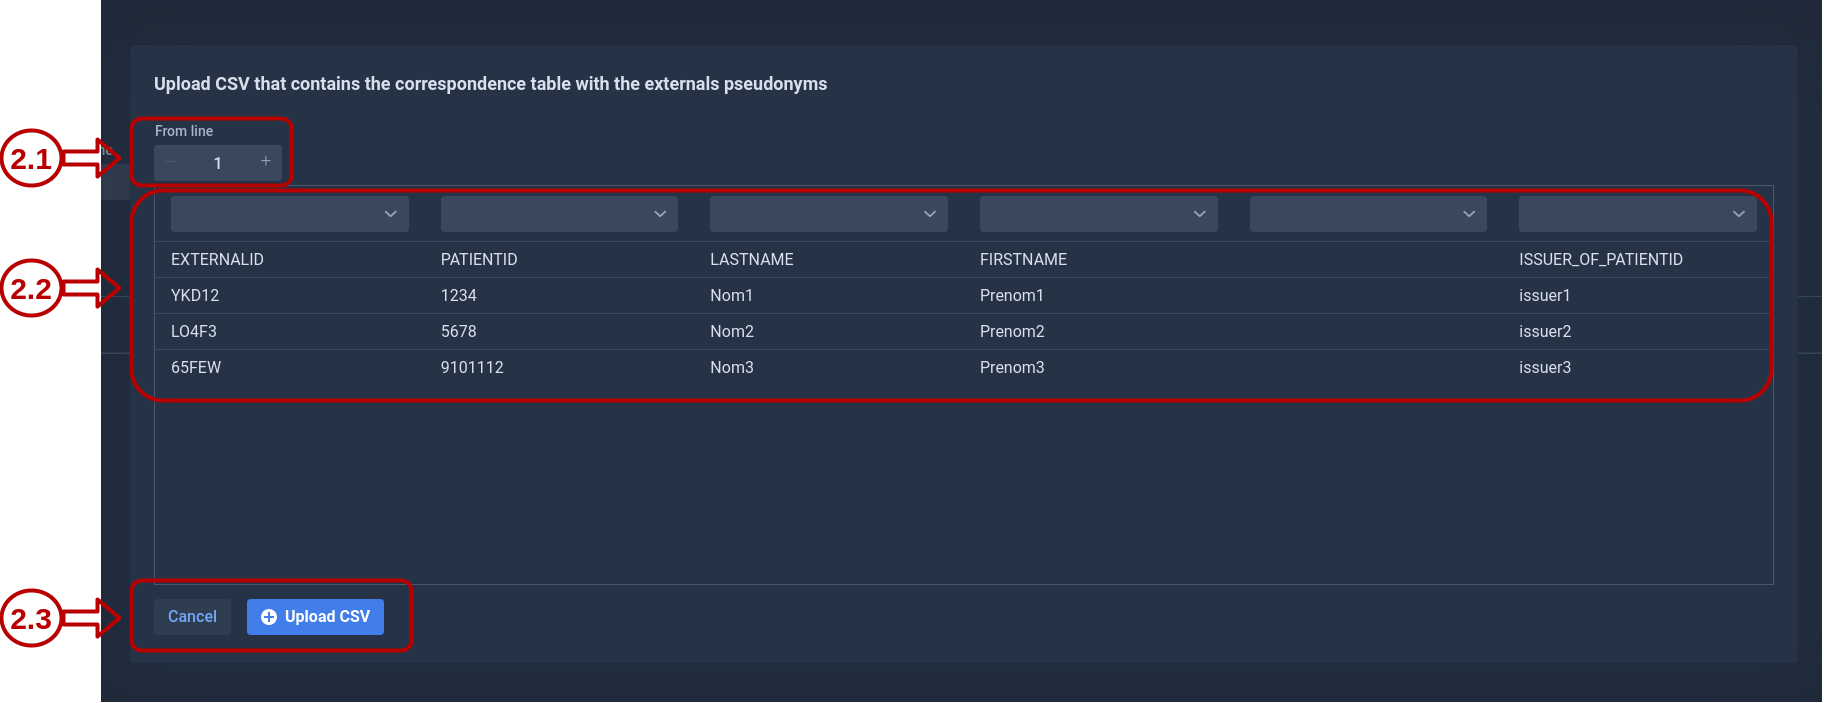
From line: This field defines the starting row for the import. Use this to skip header rows or other non-data lines at the beginning of the file.
Column assignments: Map each CSV column to the corresponding pseudonym attribute. Only the Patient ID and External Pseudonym fields are required. Other fields are optional.
2.3 Import validation
Click Upload CSV to import the data. Karnak performs validation checks including:
- Duplicate Patient IDs
- Duplicate Pseudonyms
- Required field validation
If validation errors occur, they will be displayed and the import will be rejected.
3. Add a new patient manually
You can also add external pseudonyms manually by filling in the form fields:
- External Pseudonym (required)
- Patient ID (required)
- Patient First Name (optional)
- Patient Last Name (optional)
- Issuer of Patient ID (optional)
Click Add patient to add the entry to the external pseudonyms table.
4. Pseudonym management
4.1 Edit or delete individual entries
Each pseudonym row has action buttons:
- Edit: Modify the patient fields
- Delete: Remove the pseudonym from the cache
4.2 Bulk operations
Select multiple rows using the checkboxes on the left side of each row. Click Delete selected patients to remove all selected entries and confirm the action in the dialog.
4.3 Delete all patients
The Delete all patients button removes all external pseudonyms for the selected project only. Pseudonyms linked to other projects are not affected.