Gateway
The Gateway page allows you to configure Forward Nodes in Karnak. A Forward Node represents a DICOM Application Entity (AE) that receives DICOM instances and routes them to one or more destinations.
Forward Node
This page lists all the forward nodes configured in Karnak and allows you to create, edit, and delete them.
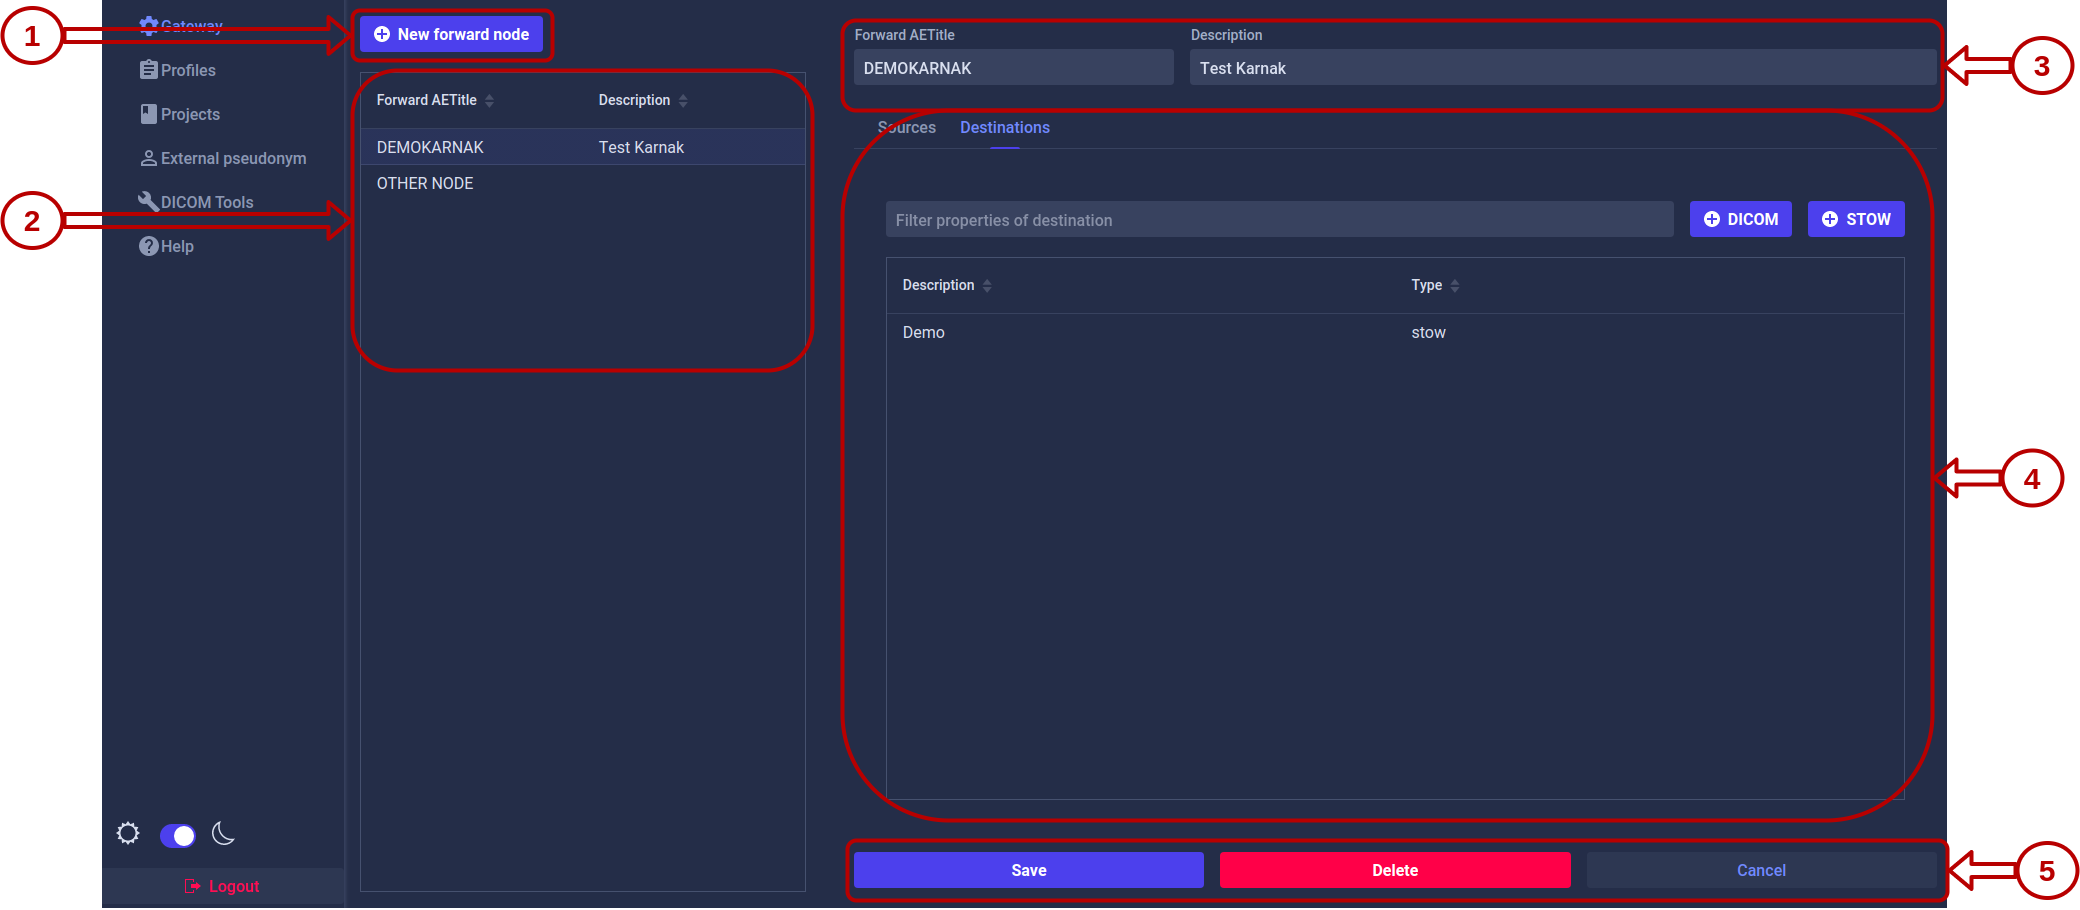
1. Create a Forward Node
Click the New forward node button. A form will appear:
- Enter a unique value in the Forward AETitle field. AE Titles must not exceed 16 characters.
- Click the Add button

The new forward node appears in the list and is automatically selected. Optionally, add a description and save your changes.
Info
The Forward AETitle must be unique across all forward nodes in the Karnak instance.
2. Forward Node List
All configured forward nodes are displayed in the left panel.
Select a forward node from the list to view and manage its configuration in the right panel.
Info
The copy icon next to each forward node allows you to quickly copy its DICOM configuration in the clipboard for use in DICOM clients.
3. Forward Node Parameters
In the details view, you can modify:
- Forward AETitle: The Application Entity Title of the forward node
- Description: An optional description to help identify the node’s purpose
Click the Save button to apply your changes.
4. Sources and Destinations
Each forward node can be configured with:
- Sources: Control which DICOM nodes are authorized to send data to this forward node
- Destinations: Define where received DICOM instances should be forwarded
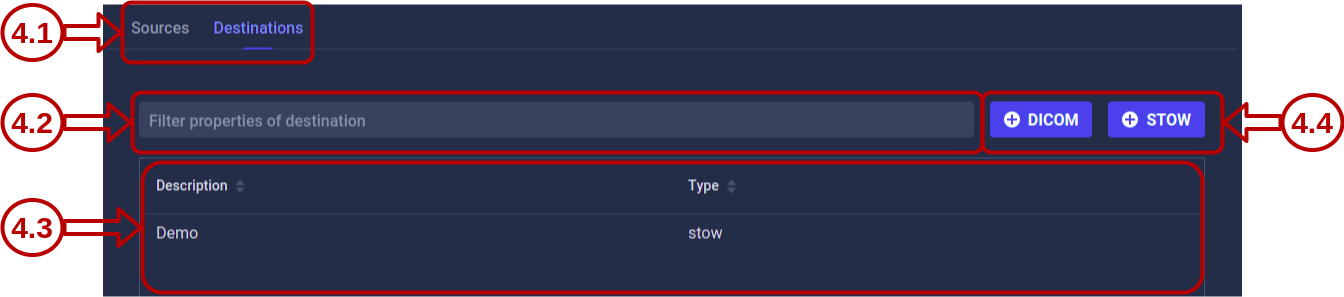
4.1 Navigation
Use the tabs to switch between the Destinations and Sources views for the selected forward node.
4.2 Filtering
Destinations tab: Filter by destination description
Sources tab: Filter by AE Title and hostname
4.3 List
All destinations or sources associated with the forward node are displayed here.
Click any item in the list to open its detailed view and edit its configuration.
4.4 Actions
The available action buttons depend on the active tab.
Destinations tab:
Create a new destination using either the DICOM or DICOM WEB (STOW) protocol. See the Destinations page for detailed configuration instructions.
Sources tab:
Create a new source to control which DICOM nodes can send data to this forward node. See the Sources page for detailed configuration instructions.
5. Forward Node Actions
Three action buttons are available:
| Action | Description |
|---|---|
| Save | Saves changes made to the forward node parameters |
| Delete | Deletes the selected forward node and all associated configurations |
| Cancel | Reverts unsaved changes to the forward node parameters |
Warning
Deleting a forward node will also remove all associated sources and destinations. This action cannot be undone.